10.1 Camera Parameters for Mission Planning
Camera parameters are required for correct calculation of the forward and side overlap when planning a mission. The focal length depends on the lens used.
| Parameter | Sony ILX-LR1 |
|---|---|
| Focal length, mm | depends on the lens (for example, 24 for SEL24F28G) |
| Sensor width, mm | 35.7 |
| Sensor height, mm | 23.8 |
| Horizontal resolution, px | 9504 |
| Vertical resolution, px | 6336 |
10.2 Camera Profile in DJI Pilot 2
To plan a route in DJI Pilot 2, create a custom camera:
- Turn on the remote controller and open DJI Pilot 2.
- Go to the Flight Route tab and create a new mapping route (Mapping).
- Outline the survey area on the map, tap Select Camera → Custom Camera and add a new camera.
- Enter the camera name, image size, sensor size, focal length, minimum interval between images (see chapter 10.1) and tap Done.
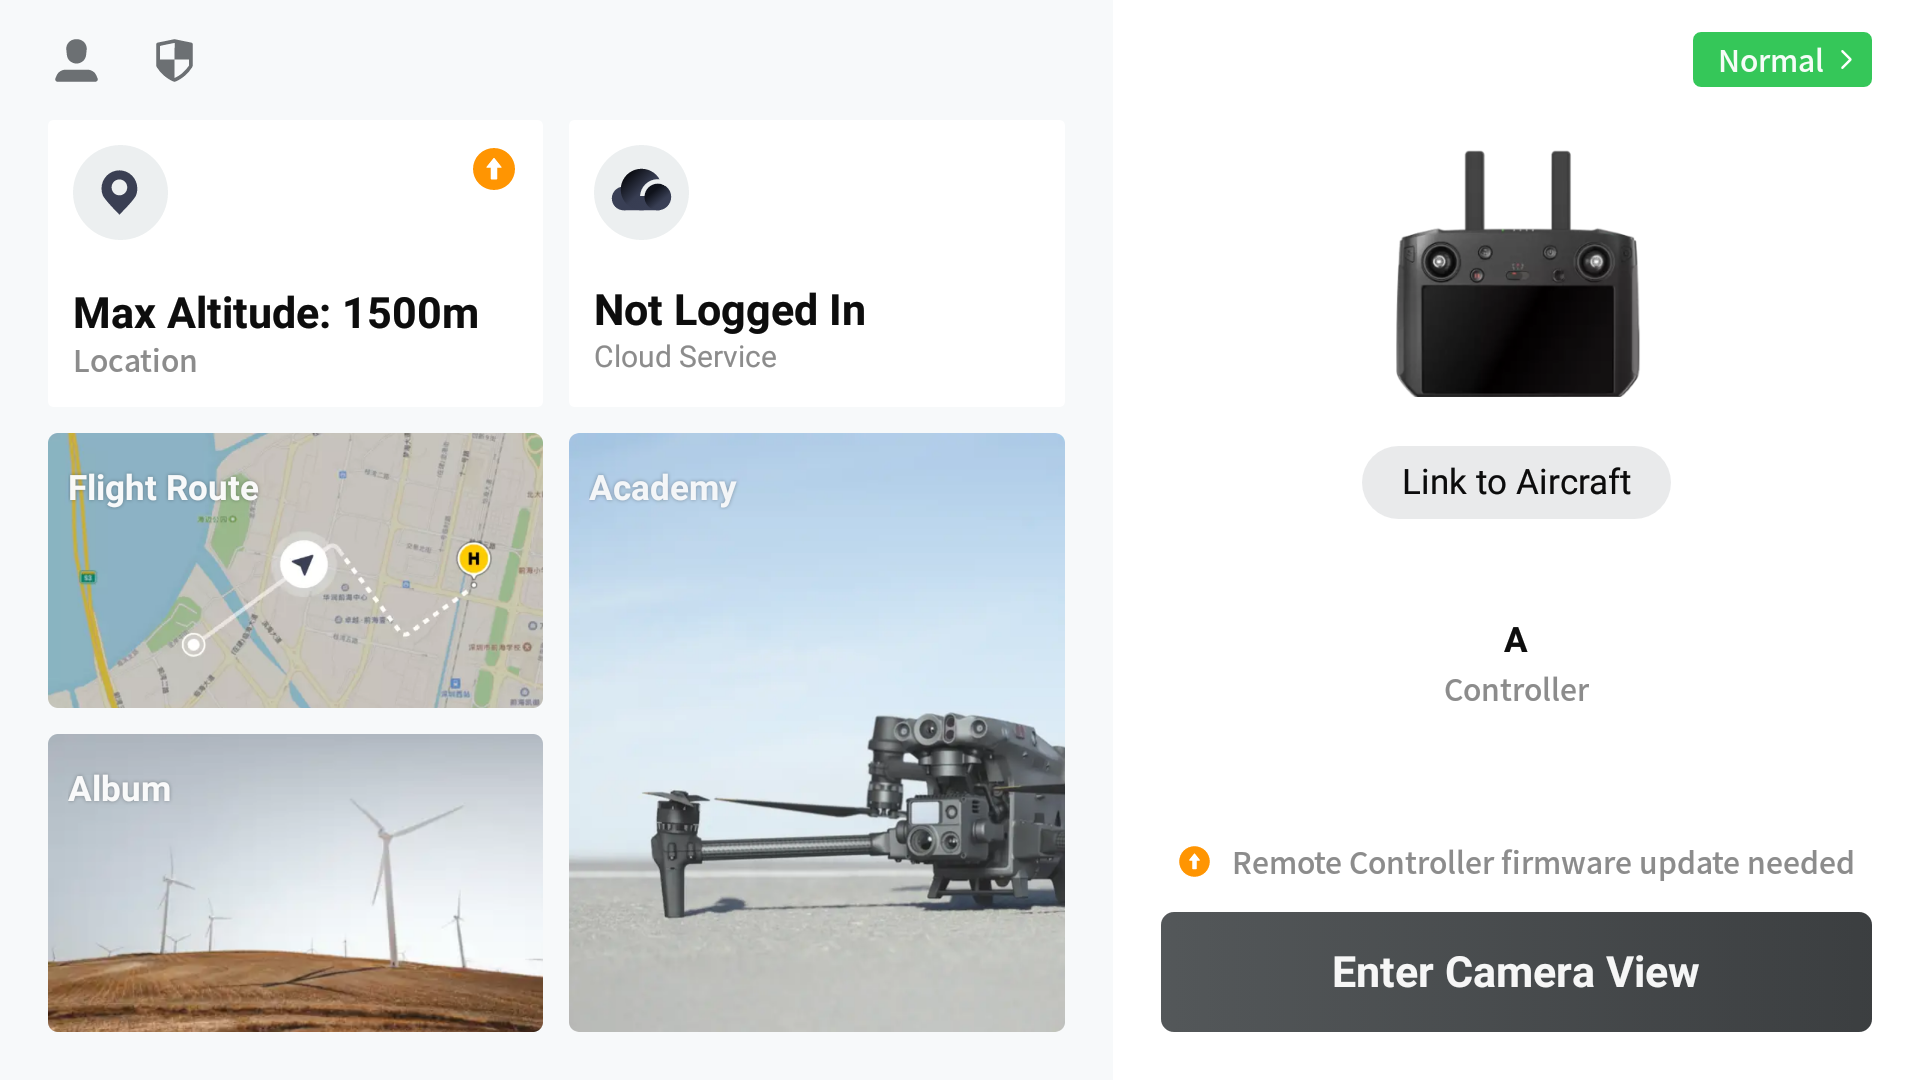
DJI Pilot 2: main screen, Flight Route tab.
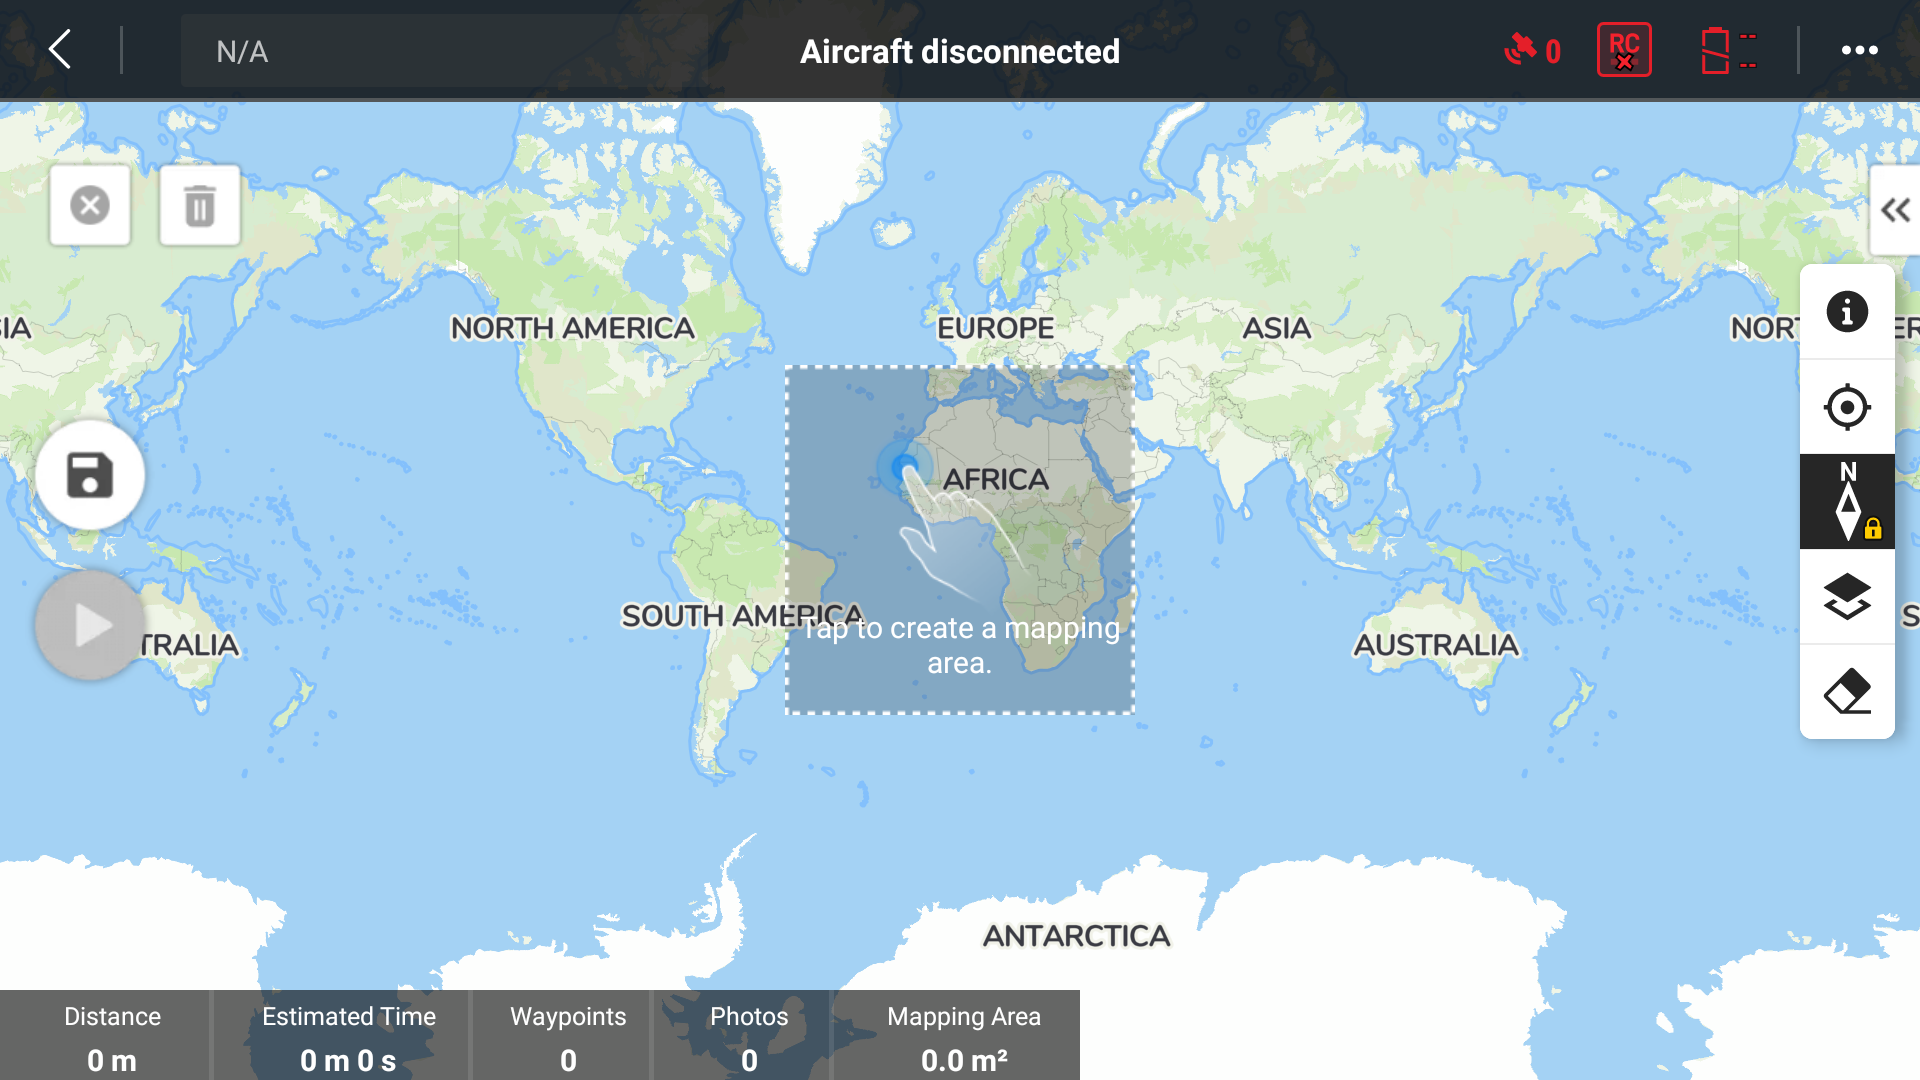
Creating a survey area on the map.
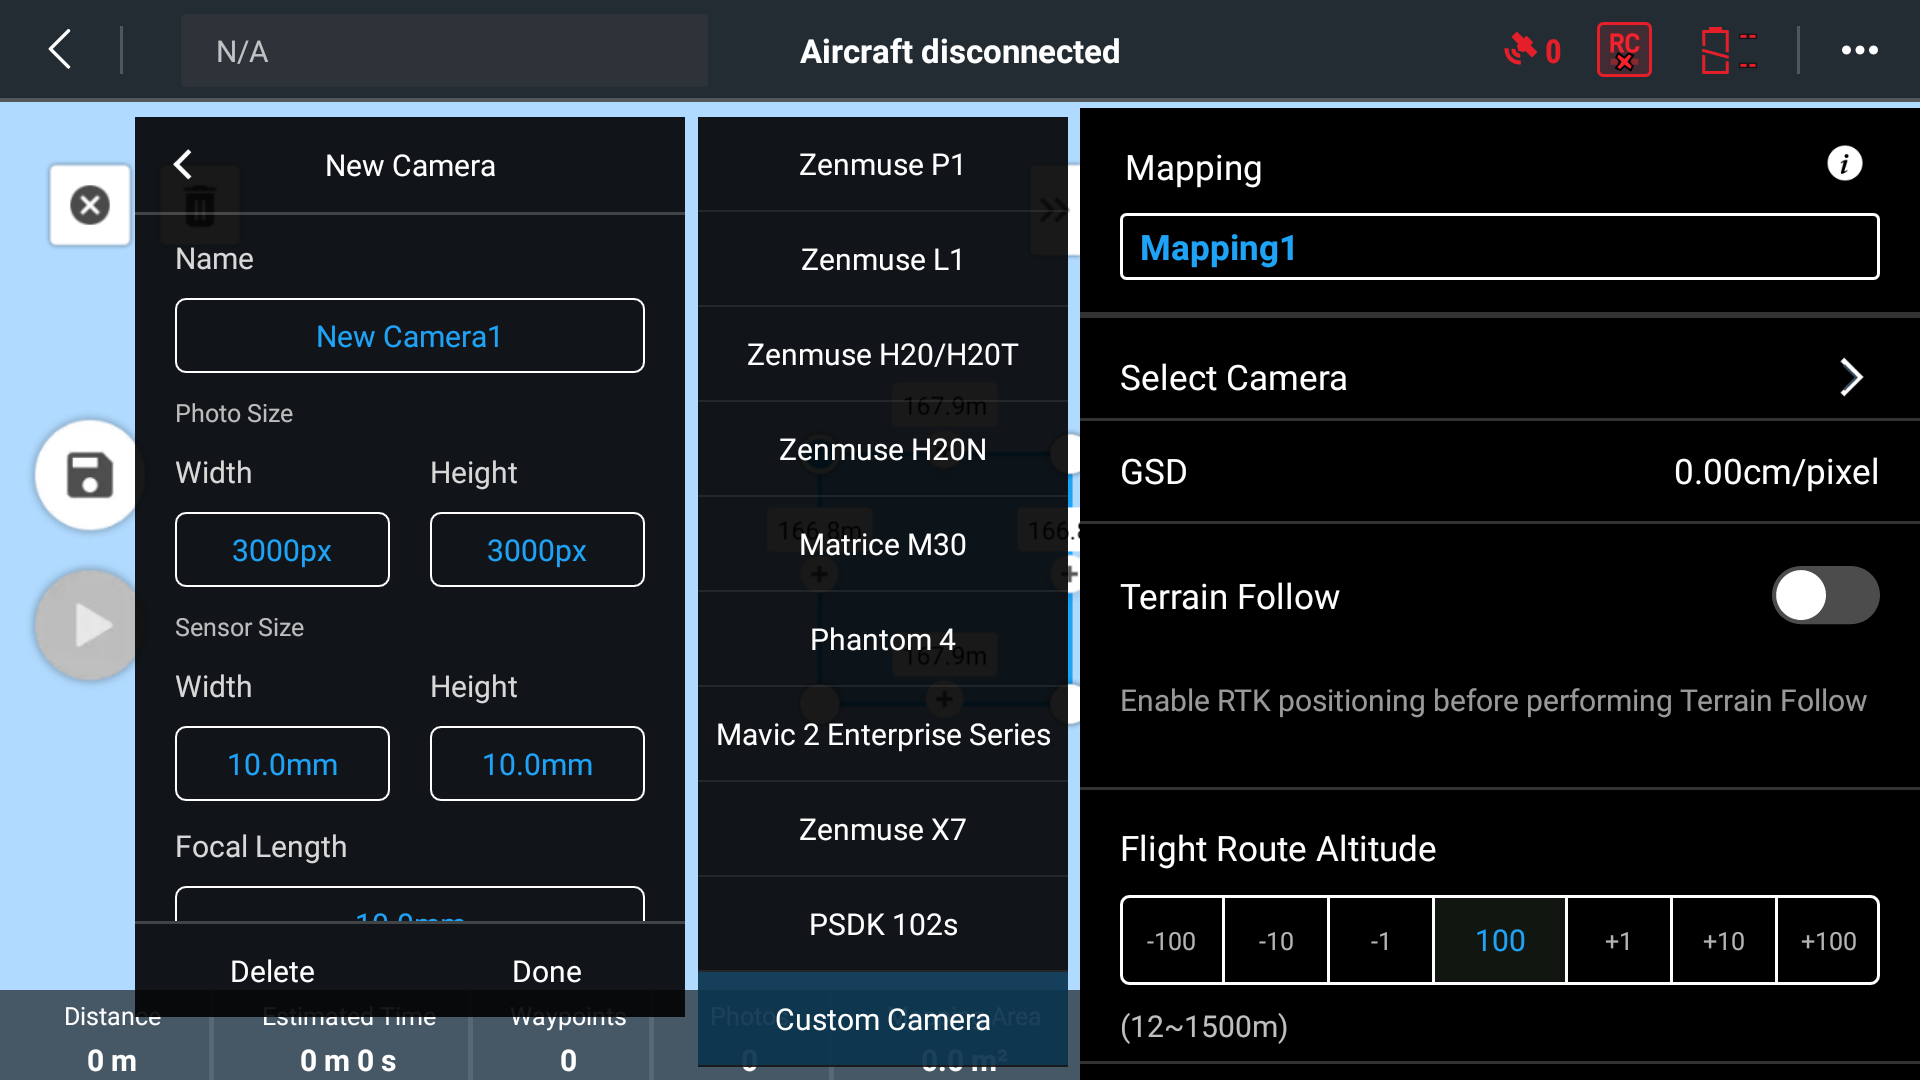
Adding a custom camera (Custom Camera).
10.3 Base Station Setup
PPK post-processing requires data from a stationary GNSS receiver recording raw measurements in static mode. The DJI D-RTK base station for RTK mode is set up according to the same placement rules. Meet the following conditions:
- Turn on the base station before the first power-on of the drone, and turn it off after all flights are completed. The base station operating time must fully cover the operating time of the LR1 Control Module.
- Base station file formats for TOPOSETTER: RINEX (*.obs, *.rnx) and raw files of u-blox (*.ubx) and Unicore (*.bin) receivers. The software determines the file role (rover or base) automatically.
- Instead of your own base station, you can use files from continuously operating reference stations (CORS) in RINEX format.
- Base station data recording rate - 1 Hz. A lower rate can reduce post-processing accuracy, a higher rate proportionally increases the file size without any gain in accuracy.
- Distance from the base station to the flight area - no more than 25 km, for better accuracy - no more than 10 km. The farther the base station, the longer the measurements must be recorded. When recording GPS, GLONASS, Galileo and BeiDou at 1 Hz in open terrain, the minimum observation time is: T = 5 min + 1 min × L, where L is the distance to the base station, km.
- Determine high-precision coordinates of the base station antenna phase center in the project coordinate system by any available method: RTK, PPK, static. If precise coordinates are not available, TOPOSETTER calculates them by the PPP method ("Calculate by PPP" button): centimeter accuracy requires a base recording of at least 2 hours; with a recording shorter than 1 hour, the accuracy is about 10 cm.
When using the coordinates of a ground point, add the pole (tripod) height and the height of the receiver antenna phase center. Otherwise, a height error of this value will appear in the project.
- The base station antenna must be stationary and located in the most open area possible with a clearly visible sky, away from obstacles and sources of interference. Set up the base station on a securely fixed tripod on high ground, a building roof or open terrain away from tall objects.
Do not set up the base station on a vehicle - it is practically impossible to keep it stationary. Do not set up the base station near or under power lines, trees, buildings, fences, in gorges or near a railway. Near a road, short-term signal loss is possible due to portable GNSS jammers in vehicles.
Post-processing uses only satellites that are equally well visible both at the base station and on the drone. The drone in the air almost always sees satellites better, so the quality of the result depends directly on how open the sky is above the base station.
10.4 Marking and Surveying Ground Control Points
To assess the accuracy of the final products, mark and survey targets (ground control points) before the field work. In TOPOMAPPER, the control points are measured in the images and included in the accuracy report.
- Prepare the targets or the materials for marking them in advance: spray paint, contrasting tape, crosses, nails.
- In urban areas, road markings are convenient to use. Place the targets on a level surface not obstructed by trees, houses or power lines.
- Place at least 10 targets in the flight area. For large sites, determine the distance between targets using the formula L = R × 20 000 px, where L is the distance between control points and R is the ground sampling distance of the images (GSD).
- The targets must be clearly identifiable both in the images and on the ground.
- Distribute the targets evenly over the entire survey area.
10.5 Aerial Survey Procedure
- Power-on. Make sure that nothing obstructs the camera and the gimbal and that the camera can rotate freely. Turn on the drone and wait for the gimbal and the LR1 Control Module to initialize (see chapter 6).
- Software launch. Open DJI Pilot 2 and make sure that the camera with the TOPODRONE LR1 Control Module is displayed in the app as a payload.
- Camera view. Open the camera view and check the status window: "SD mount OK" (see chapter 3.3).
- Positioning. The mode (PPK or RTK) is selected before the survey and does not change during the work. In PPK mode, make sure that the base station is turned on and recording data (chapter 10.3). In RTK mode, check the FIX status (chapter 7).
- Image setup. Set the parameters in the Payload Settings panel according to chapter 9.
- Compass calibration. Calibrate the drone compass if this is the first flight in this area.
- Takeoff to the working altitude. Raise the drone to the working altitude manually or upload the mission, tap "Start", and after reaching the working altitude, tap "Pause".
- Lowering and centering the camera. Tilt the camera down to 90° with the left dial of the remote controller. If the camera tilts more than 90° and starts looking backward, enable the tilt limit in the DJI Pilot 2 gimbal settings. Center the camera on the pan axis - this aligns the camera with the heading if the right dial of the remote controller was accidentally touched earlier.
- Focusing. Focus the camera on the ground and lock the focus (see chapter 9.3).
- Route start. Upload the route and tap "Start" (if the takeoff was performed manually) or "Resume" (if the route is already uploaded).
- In-flight monitoring. Monitor the image sharpness and exposure. If the image is unsatisfactory (focus lost, too dark or too bright), stop the flight and return to step 5.
- Landing. Before landing, tilt the camera up with the left dial of the remote controller so as not to damage the lens. Provide a level, firm and clean landing surface.
It is recommended to land the drone into the hands of the pilot's assistant: this reduces the amount of dust raised and shock loads and extends the service life of the equipment.
Repeat all steps before each flight.