Img. 1. TOPODRONE DJI TOPODRONE DJI Mavic Mini PPK.
Since 2018 TOPODRONE team develops affordable survey UAVs that have become a trendsetter on the market of survey drones and found their application in engineering surveys, construction monitoring, mining, environmental researches, mineral exploration, agriculture, aerial surveys, urban planning and many other industries that require precise maps and 3D models. You can get more information about the use of TOPODRONE drones, upgraded with survey equipment on our youtube channel.

Img. 2. TOPODRONE product line.
Today we would like to present you the world's smallest survey drone, the TOPODRONE DJI Mavic Min PPK, equipped with a precise multisystem L1/L2 GNSS receiver and a 12 Mp camera with fixed focal length.
The main idea of this product is to create an affordable and user-friendly survey drone, yet an indispensable instrument for any surveyor. It is in common knowlege that a lot of surveyors and designing engineers have difficulties while using professional survey equipment - heavy total stations and GNSS receivers. This makes them apply to survey teams.
Advantages of surveying with a mini-drone
TOPODRONE DJI Mavic Min PPK weighs less than 250 grams, has a flight time of 16 minutes and is very easy to handle. The price of spare batteries and parts for this drone is the lowest, compared to other drone models.
It has been proved that after 1-2 hours of training almost anyone, even a teenager can become a pilot of this drone. All aerial survey examples, presented in this article, have been made by a 14 year old pilot.
It should be stated that the technology of surveying, developed by TOPODRONE team, allows to fully exclude using a personal GNSS receiver as a base station. This allows to significantly reduce the initial cost of the surveying kit, which is very important for entry-level solutions.
The use of TOPODRONE DJI Mavic Min PPK
Aerial survey

Img. 3. TOPODRONE DJI Mavic Mini PPK flight preparations.

Img. 4. Controlling TOPODRONE DJI Mavic Mini PPK.
As we have mentioned before, there is no need to set a GNSS receiver as a base station before the flight if your location is in the zone of a national survey network, that are widely distributed all over the world.
Thus you only must turn on your drone and carry out an aerial survey that will satisfy all your needs. We recommend flying intersecting routes at an altitude of 30-50 metres and doing oblique surveying of the building or the boarders of an area to conduct precise photo processing.
Note that the drone camera is set to infinity and has a stable focal length. It is important for the further photogrammetric processing and allows to do it fully in automatic mode.

Img. 5. Mission planning.
The process of surveying of an area of 10 hectares (100 000 sq. m) usually takes less than 16 minutes. Having enough batteries you can survey an area of more than 100 hectares or 10 areas 10-20 hectares each in a single day.
GNSS postprocessing and image geotagging
The next step of surveying is the image data processing. Before doing it you need to download a static GNSS data file from the website of the local base network holder. We recommend choosing a base station network that fully covers the survey area and has precise coordinates of all base stations.

Img. 6. A base station network.
After that you can upload the photos, the GNSS data from the drone and the base station data that match the survey time to the GNSS postprocessing and image geotagging software TOPOSETTER 2 PRO. Then you only need to initiate the process of postprocessing GNSS data and geotagging images. After that the software will output the following data:
- Images with precise coordinates (X,Y,Z) and processing accuracy, written into EXIF tags;
- The list of image names and their WGS84 coordinates;
- The list of image names and their coordinates in local coordinate system;
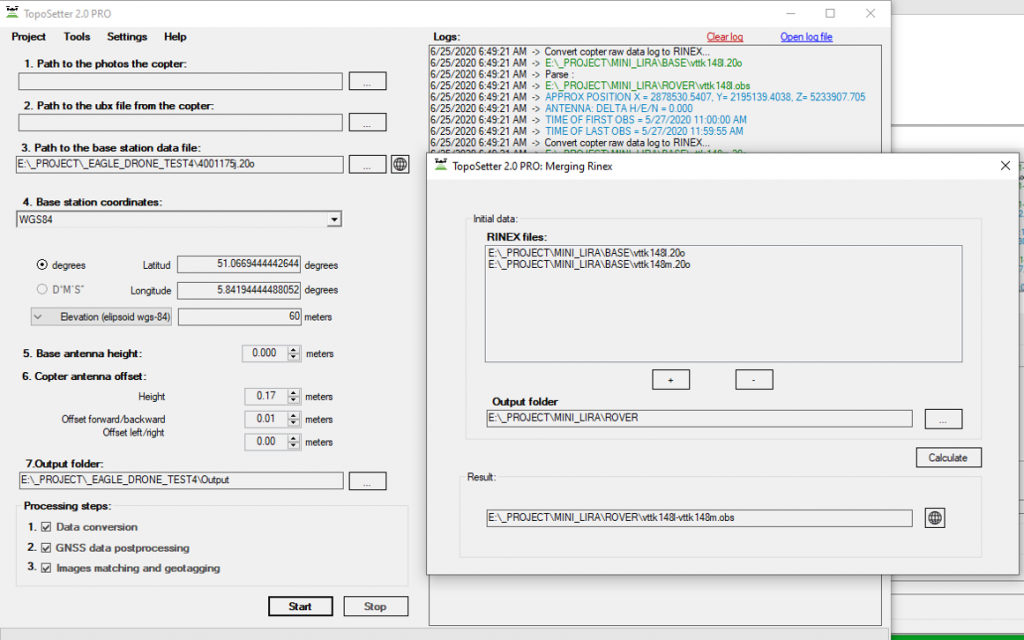
Note that if you have downloaded multiple files, containing a single hour of data, you can use the built-in tool for merging Rinex data files.
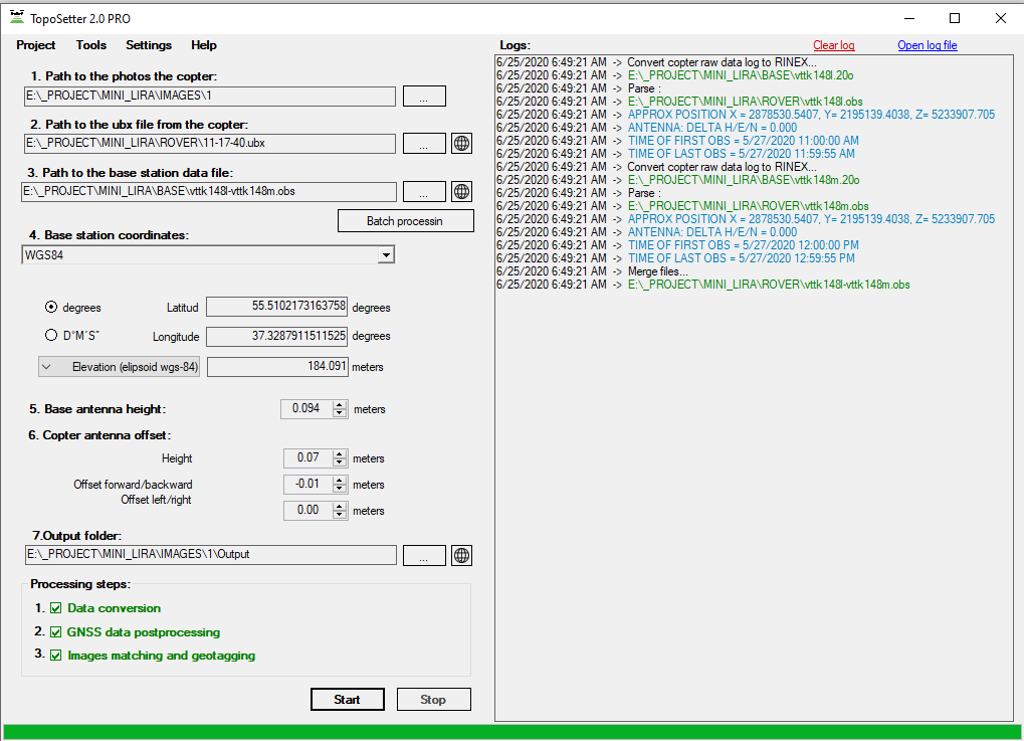
The base station coordinates are automatically uploaded from the Rinex file and converted into the selected coordinate system. To date the TOPOSETTER 2 PRO software supports wide range of coordinate systems.
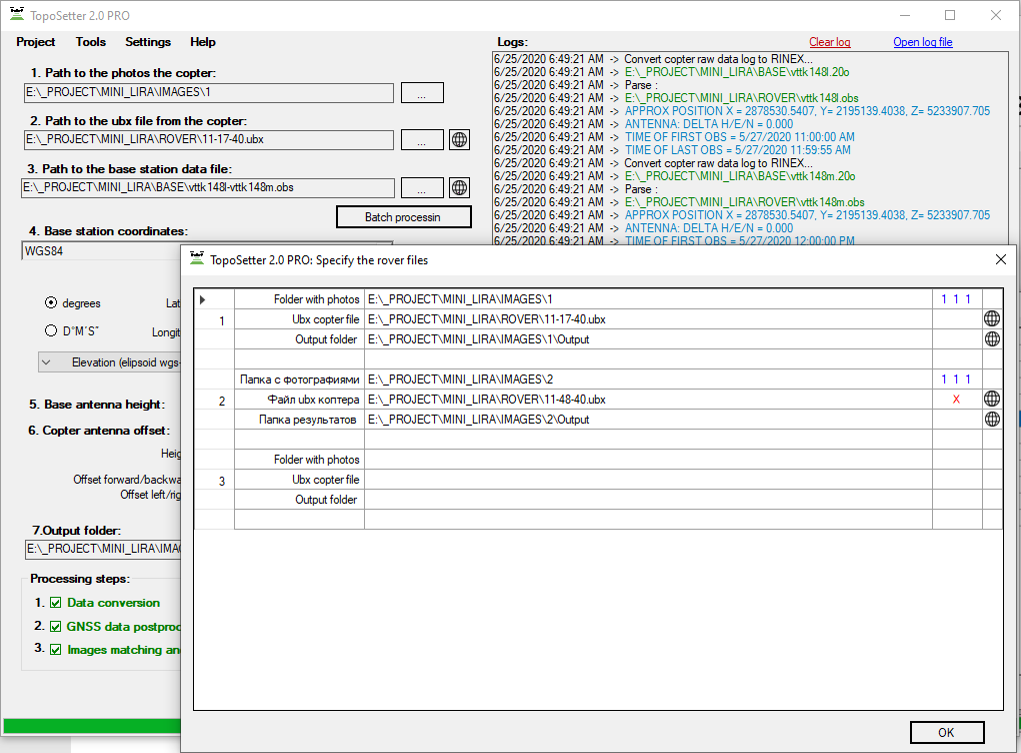
In TOPOSETTER 2 PRO we did our best to implement the most useful and necessary features, including the automatization of processing multiple flights, that were made from a single base station. This can be done by clicking 'Batch processing' button. After that you will be able to upload all your survey missions for further automatic processing of precise coordinates.

Img. 8. Merging multiple Rinex files into one.

Img. 9. The base coordinates are read from the Rinex file automatically and converted into the selected coordinate system.

Img. 10. Batch processing of data from multiple flights that were made from a single base station.
Photogrammetric processing of images from the drone
After that the images with precise coordinates are uploaded into the photogrammetric processing software Pix4Dmapper. You can also import a local coordinate system from a prj file that is located inside the TOPOSETTER 2 PRO installation folder at the first step.
The only thing you need to do after creating the project is to initiate the aerial triangulation, set the calibrated focal length inside the internal camera orientation parameters, update the aerial survey alignment and finally initiate the process of dense point cloud generation.

Img. 11. The results of automatic dense point cloud classification.

Img. 12. The location of survey area and GCPs.

Img. 13. Aerial triangulation results.
Photogrammetric processing. Quality control.
Pay attention to the focal length value that remains stable during all flights. It allows to carry out photogrammetric processing in a fully automatic mode and minimize using GCPs.
We carry out an instrumental quality control with previously set GCPs at every survey area. The accuracy of the dense point cloud is approximately 3-5 cm in plane and in height as well. Wherein no GCP has been used while doing the image alignment.
Creating orthophotomaps and vectorization based on the aerial survey data
Pix4Dmapper interface allows to perform point-shaped, linear and polygonal objects, whereas the high precision and detail level of created dense point cloud, depicting buildings and constructions, poles, power lines, fences, roads and flora, fully implements the ability to make an orthophotomap, satisfying the precision and detail requirements of up to 1:500 scale, in the office.
Another useful tool is the ability to adjust the knots of polylines with separate photos. It provides precise measurement and vectorization of building edges, fences and constructions with accuracy of up to 2-3 cm. The highly detailed and precise point cloud allows to perform its automatic classification and get the terrain, road surface, buildings and constructions, flora and calculate the contour lines.

Img. 14. Dense point cloud.

Img. 15. Vectorization and measuring powerline sagging .

Img. 16. Vectorization of brows and slopes, roads, powerlines, fences, buildings and constructions.

Img. 17. Precise adjustment of building edges with an aerial image.

Img. 18. Dense point cloud.

Img. 19. Results of automatic classification of the dense point cloud.
Export into GIS and CAD software, creating an orthophotomap
The final step is to export all point-shaped, linear and polygonal objects, contour lines and orthophotomap in SHP or DXF format and load it into GIS or CAD software. After that they can be represented in accordance with the requirements of the customer as the map layout.

Img. 20. Combining the orthophotomap and the cadastral map of an area.

Img. 21. Automated generation of contour lines based on the classified point cloud.

Img. 22. Vectorization and creating map layers.

Img. 23. Automatic classification of a point cloud.

Img. 24. Topographic map of an area.
Using TOPODRONE DJI Mavic Mini PPK for survey and cadastral purposes
As you can see from provided data, the use of TOPODRONE DJI Mavic Mini PPK for survey and cadastral purposes does not require special skills and almost anyone can meet this task.
The use of a small and lightweight survey drone allows to significantly reduce the time of field works and avoid applying to high-priced professional surveyors.
The comprehensive solution of TOPODRONE provides the automatization of the whole process: TOPOSETTER 2 PRO software does the postprocessing of GNSS data and geotagging the images in a fully automatic mode. You simply need to copy the data from your drone and the base station and initiate the processing in the local coordinate system you have chosen.
Due to the fixed focal length, the photogrammetric processing has never been so simple before. Upload the processed with TOPOSETTER 2 PRO data into Pix3Dmapper software and carry out photogrammetric processing and point cloud generation in automatic mode.
With the use of a highly detailed point cloud you can do the vectorization of objects in 3D mode, just like you are in field, whereas the automatic classification will allow you to get the terrain and create the contour lines in a few minutes.
The precision of a 3D model and an orthophotomap satisfies the requirements of 1:500 scale and smaller whereas the highly detailed point cloud allows to carry out the full process of vectorization of the area in office, including the edges of buildings, and to measure the sagging of powerlines.
The low price of a drone and its spare parts (batteries, propellers) and its easy handling moves us closer to the day when every cadastral engineers, constructors, geologists or surveyors will afford buying a survey drone and significantly increase their productivity by reducing the time and efforts on doing the field works.
