To obtain quality images, you must adjust the camera image. In case of incorrect settings, images from TOPODRONE P61 camera may be unsuitable for further photogrammetric post-processing. The final parameters are always individual, as they depend on the current lighting conditions, speed and altitude of the drone.
To obtain high-quality and correct images from the TOPODRONE P61 photogrammetric camera using the AGROWING multispectral lens, it is recommended to use the following parameters:
Shooting mode: Shutter speed priority
Shutter time: 1/1000 - 1/4000
ISO: Auto
White Balance: Auto
Set the auto continuous focus mode (AF-C)
Switch off autofocus when the shutter is turned on
Set the camera to Single Shooting mode
Turn off the Automatic Review
Set high quality photos
Adjusting the parameters using the Smart Controller
When the aircraft is switched on, the camera receives power, initializes and appears in DJI Pilot 2 as the TOPODRONE payload.
Step 1: Launch the DJI Pilot2 software. Make sure the software recognizes the drone and payload type Step 2. Select “Enter Camera View”, then the “Prepare for Flight” window will open, after closing this window, the Topodrone P61 camera view will be displayed Step 3. Make sure that there is a live video stream from the camera.
Step 4. Open the camera settings menu by clicking on the Three Dots button. Step 5. The TOPODRONE P61 camera payload menu opens Step 6: Adjust the 4 main image parameters: Light Sensitivity, Aperture, Aperture and Shooting Mode. Step. 7 Step 8: Close the menu and in AF (autofocus) mode, tap in the middle of the screen to focus the image. It is recommended to perform this step while flying on the ground from the mission operating altitude. Step 9. Change the focus type from AF to MF. In this case all photos taken by TOPODRONE P61 will have the same focus value. This is important for correct photogrammetric post-processing
Configuring shooting settings using a Wi-Fi connection
After the camera is turned on, an access point with the name of the Wi-Fi network TD_61mp will appear, to which you can connect using the password: topodrone.
After the connection has been successfully completed, in the browser window you should enter the address: 192.168.10.1
The Main menu displays the current camera settings and the video stream.
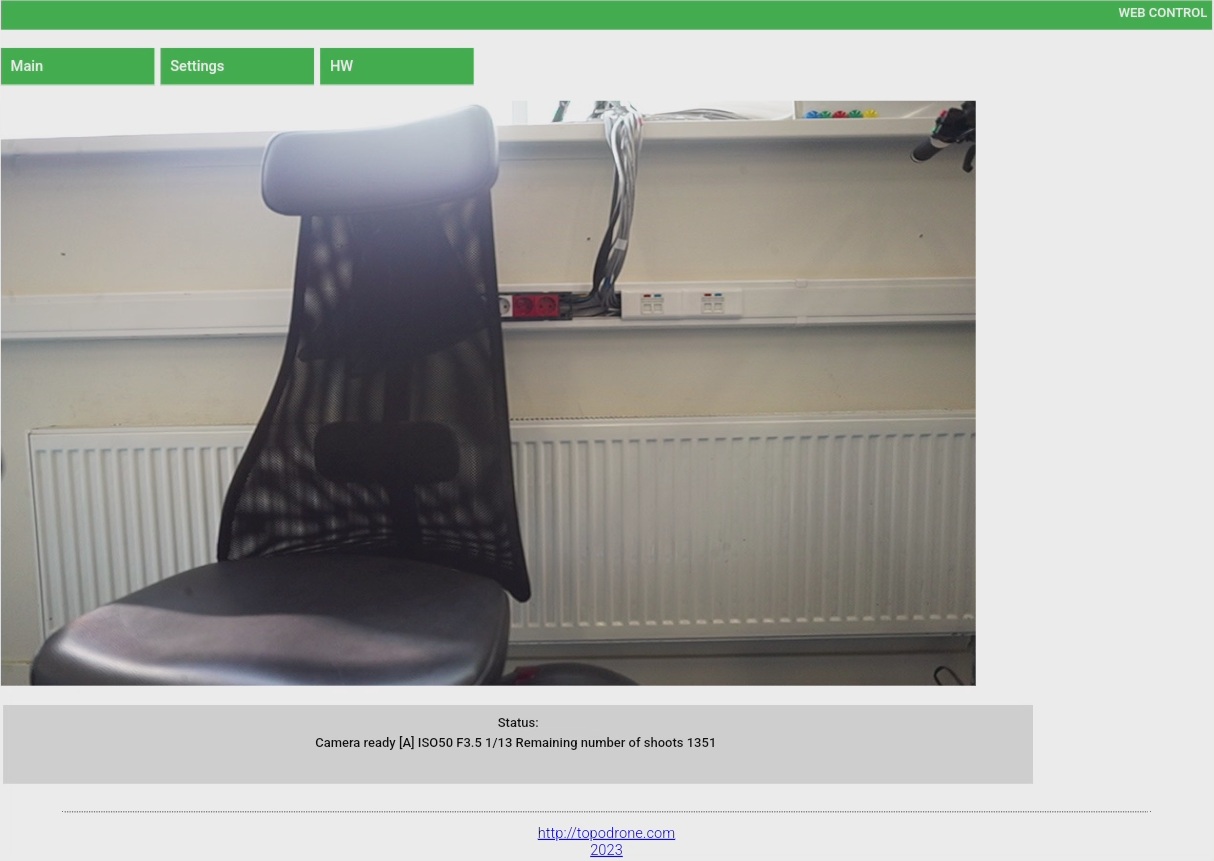
[S] MF ISO400 1/30 N/A 0.0 microSD[1696] ZOOM 0% Operating Mode Available values:
[S] - Shutter speed priority
[M] Manual
[A] Aperture priority
[iA] Intelligent Auto
[P] Program Auto
Focus Mode Available values:
AF - center point autofocus
MF - manual focus
light sensitivity Available values: 50...51200, Auto Shutter speed
Available values: 1/4000..30' Aperture value F
Available values: 2.8...22 (depending on lens)
(N/A = not available for this lens) Exposure Correction
Available values: -5.0...+5.0 in steps of 0.3. Number of remaining photos
Available values: varies with memory card and selected photo quality. Optical zoom value
Available values: 0-100, magnification depends on the lens
On the Settings tab, you can change the camera settings described in the previous step.
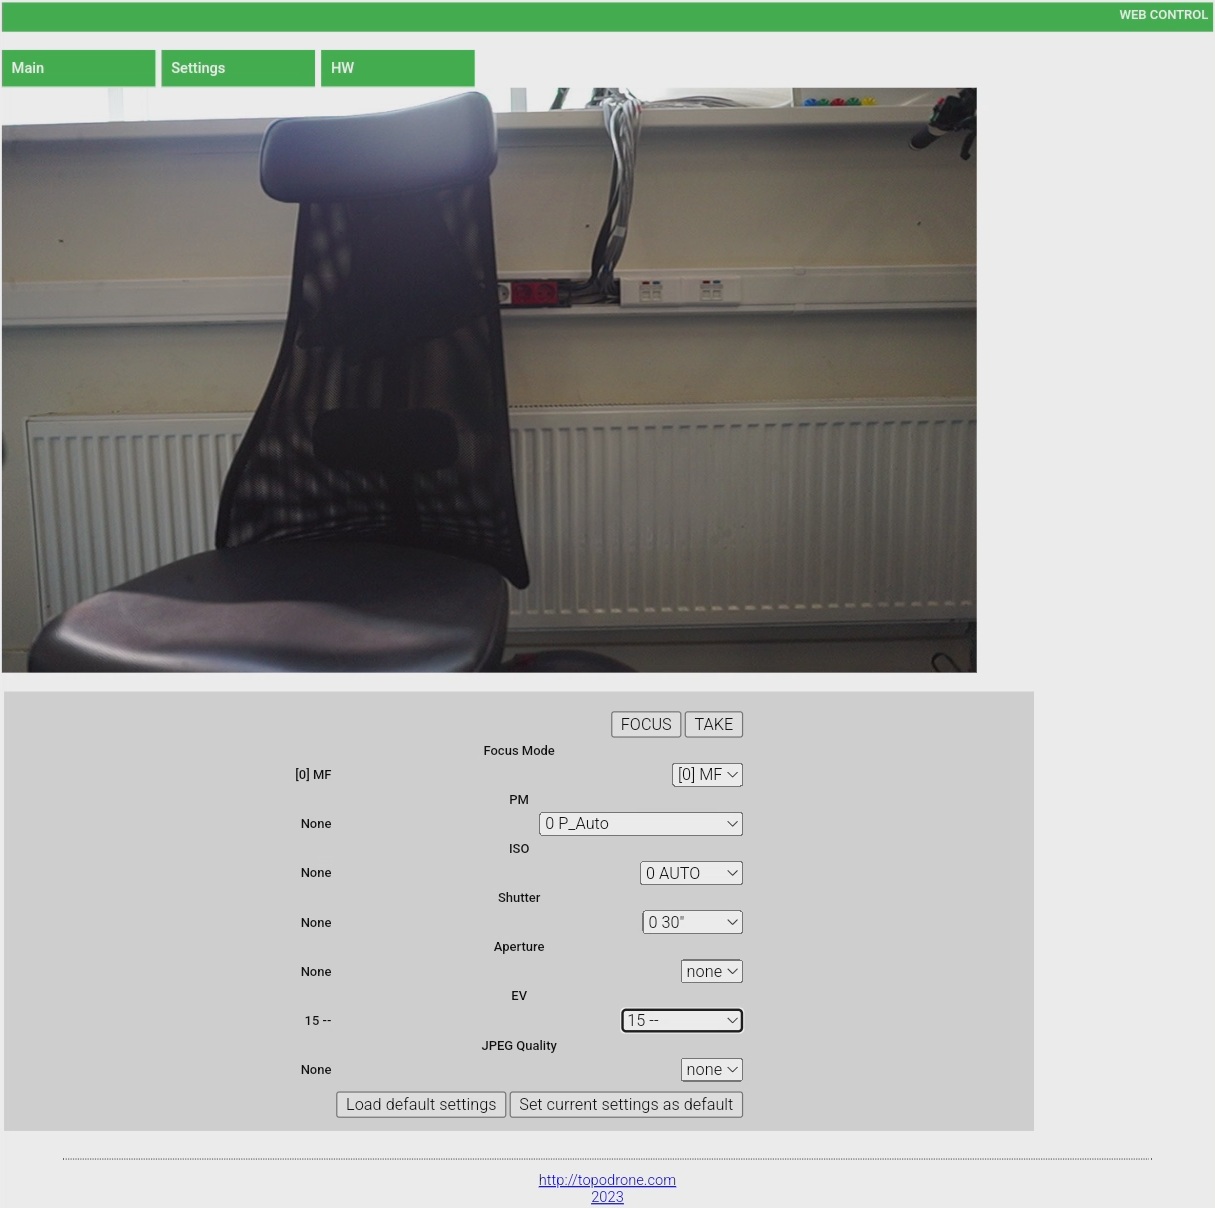
The following options are available on the settings page:
FOCUS - When pressed, the camera will focus. Available in autofocus mode only.
TAKE - The shutter button. When pressed, the camera will take a picture.
Focus Mode - Selects the focus mode (manual or auto).
PM - selection of operating mode, S - shutter speed priority, M - manual, A - aperture priority, P - program auto.
ISO - light sensitivity.
Shutter - shutter speed.
Aperture
EV - exposure step change.
JPEG Quality - JPEG quality. Available values: Fine/X.Fine/RAW.
Current values of camera parameters are displayed in the left column.
On the HW tab, use the buttons to navigate through the TOPODRONE P24 menu. This requires an HDMI connection to an external monitor. Use the HW tab only for special user settings.
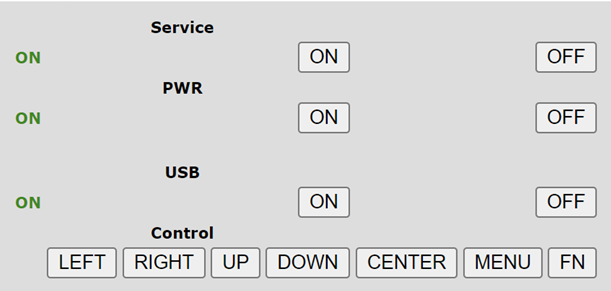
Enter